The Ultimate Guide to Well Ownership & Maintenance
Our blog is written by real experts— not AI. Each guide is carefully reviewed and updated based on the latest research. Plus, with no affiliate links, you can count on unbiased insights you can trust.
If you want to make sure your private well water is safe to drink, proper well maintenance is indispensable. A little upkeep each year can go a long way to ensure your well remains a reliable and safe drinking water source for decades.
In this ultimate guide to well maintenance, we’ll go over the essentials to keep your water well system functioning properly.
Table of Contents:
- Well Owner’s Maintenance Checklist
- Proper Well Inspection
- Proper Construction and Installation
- Protecting Your Well
- Performance Monitoring
- Testing
- Treatment
- Retiring Unused Wells
- Bonus: Annual Well Maintenance Calendar
Key Takeaways
- A private well is a clean and reliable source of drinking water if it is properly installed, maintained, and tested on a regular basis.
- Installation: Make sure your well has a secure sanitary cap, is fully sealed between the casing and the borehole, and isn’t in a spot where runoff can pool around it.
- Protection: Don’t use anything you wouldn't want to end up in your drinking water within 100 feet of your well.
- Monitoring: Changes in your water quality—like taste, smell, or color—and well yield are signs you need an inspection.
- Inspection & Testing: Even if everything is flowing smoothly, schedule a well inspection at least once a year and test your well water annually for coliform and nitrates.
- Treatment: Use water testing to isolate the best treatment options for your well.
- Regular Maintenance: Keeping an eye on your well and performing general upkeep is an all-year endeavor.
Maintaining Your Well Throughout the Year
The proper care and upkeep of your well is not unlike the care and upkeep of your vehicle. What you regularly put in helps determine the quality of what comes out.
- A diligent well owner should regularly survey their well with their own eyes and hands. This is similar to occasionally scanning your vehicle and making sure your tire pressures are correct, you haven’t spotted any leaks or loosening parts, and your fluids are in good shape.
- Annually, you’ll want to have a well professional perform a well inspection. Each inspector follows a well inspection checklist to guide and standardize their practice. This is similar to taking your vehicle in for routine service where the chief mechanic will perform a standardized multi-point inspection.
Like your vehicle’s owner’s manual, there are a number of recommended practices that you’ll want to follow throughout the year to be sure you’re prolonging the life of your well. We like to call this your well maintenance checklist. The well maintenance checklist includes everything from the basics of regularly surveying your well and protecting your well, to recommending certified well inspection and testing annually.
Homeowner’s Well Maintenance Checklist
The following checklist is a useful summary of all aspects of well upkeep throughout the year, including best practices, regular visual evaluations, annual professional inspections, and your well water testing routine:
- Use licensed or certified well drillers and pump installers when a well is constructed, a pump is installed, or the system is serviced.
- Regularly survey your well. Keep an eye on your well head, proper separation along your property and be aware of changes in your well and the area around it.
- Have a professional perform an annual well inspection, including a bacterial test.
- Drinking water should be tested annually by a laboratory, and any time there is a change in taste, odor or appearance, or when the well system is serviced.
- Protect your well. Keep hazardous chemicals, such as paint, fertilizer, pesticides, and engine lubricants far away from your well. Prevent back-siphonage: When mixing pesticides, fertilizers, or other chemicals, never put the garden hose inside the tank or container.
- Use caution around your well. A damaged casing negatively impacts your water quality. Don’t mow, pile snow, leaves, or other materials around your well.
- Keep your well records in a safe place. These include the well log, as well as any well system maintenance and water testing results.
- Have a qualified water well contractor decommission your well when it has come to the end of its serviceable life (usually ~20+ years).
We’ll be detailing many of these entries below. At the bottom of this post, you’ll find an annual well maintenance calendar you can consult to help guide your seasonal well work.
Ultimate Guide to Well Water Contaminants
How to Inspect Your Well
As we mentioned, inspecting your well can refer to two equally important actions:
- Regularly surveying your own well, like when performing seasonal maintenance, which is one of your responsibilities as a well owner.
- Having a licensed or certified well professional perform a formal inspection of your well.
How Often Should I Survey My Well?
You should survey your well seasonally—and at convenient points throughout the year. This helps prevent issues that might be setting your well up for more serious problems down the line
- Check your well head and well cap regularly to ensure it is in good condition.
- Be sure proper separations are maintained between your well and other buildings, waste systems, or chemical storage facilities on the property.
- Keep the top of your well at least one foot above the ground. Slope the ground away from your well for proper drainage, and maintain that clearance throughout the year by preventing leaves or snow from building up near your well.
- Be aware of any changes to or in your well, the area around it, or the water it provides.
How Often Should A Well Be Professionally Inspected?
You should have your well professionally inspected once a year—just like testing. Be sure pumps, pipes, and storage tanks are inspected as well. We recommend having your well tested and inspected at the same time each year if there haven’t been any unforeseen circumstances.
Over longer periods of time, cracks and other forms of corrosion can occur that compromise the integrity of your well and the quality of your home’s drinking water. That’s why it’s so important to pair well testing with professional inspection.
Your annual well inspection should include:
- Visual inspection
- Valve inspection
- Electrical testing
- Flow test
- Recommended water tests
Additionally, If you’re looking to buy property with a well, you should also have the well professionally inspected prior to purchase.
Well Inspection Checklist
The Water Systems Council has made the following well inspection checklist available for your convenience. It shows the procedure a licensed inspector will follow.
Entries include the well’s location and condition, component details, and performing a flow test.
Note: If the well falls short of ideal conditions, the inspector should recommend that the homeowner contact a licensed well contractor about a more rigorous evaluation, further water testing and/or the need for well repair or replacement.
Signs You Should Have Your Well Inspected
 Always have your well inspected and/or tested when there are noticeable changes in taste, odor, or color, or pronounced changes in water pressure. Other signs include:
- Unusually high electricity bill
- Sputtering faucets
- Strange sounds from pipes or pump
- Damaged well cap
If you observe any issues, and/or if you’ve never had a professional inspect your well, contact a licensed professional well inspector immediately.
Is A Well Log Important?
Your well log is a document containing key information on the construction of the well and its geological and topographical profiles. It’s very important to keep one on hand as it will give you a clearer picture of how your well was built. Be sure to ask for all your well records when buying a home or property with a well.
Contractors must file well logs with their respective states upon completion of new wells, though specific well log requirements may differ from state to state.
Always use a licensed or certified contractor when a well is constructed, inspected, or serviced. Want to know where to find a well inspector? Find a well water service contractor near you.
How to Check Your Well for Proper Construction and Installation
If you’re moving onto a property with a well, you’ll want to look into to be sure you’re acquiring a properly constructed well. Poor well construction can lead to issues, like sediment and contamination, that can affect the well’s yield and safety.
 Investing in a professional pre-purchase inspection of a well is highly recommended. But here are some components and features you can check on your own to make sure the well was built correctly:
- Well casing: The top of your well casing should be at least one foot above ground. This keeps unwanted pests and surface water from getting into your well. The space between the outside of the well casing and the borehole wall (or annular space) should also be fully sealed with grout.[1]
- Well cap: A sanitary well cap is your first line of defense against surface contamination.[2] Regularly check the condition of the cap, making sure that it is securely attached and able to keep out insects and rodents.
- Location: Also be sure your well isn’t located in an area prone to surface runoff (e.g., a low-lying field next to agriculture or a busy road).
- Elevation: The ground surrounding your well should slope away from the well in order to prevent water pooling.
Additionally, make sure your well is properly distanced from key points on your property such as:
- Electric lines and gas pipes
- Animal kennels or confinement areas
- Septic or holding tanks
- Unused wells
How to Protect Your Well Water
Avoid using any chemicals or any other possible sources of contamination within a 100 feet radius of your well. Consider this your well’s protection zone.[4]

Avoid using anything inside of that zone you wouldn't want ending up in your drinking water. This includes substances like:
- Fertilizers
- Pesticides (i.e., insecticides, herbicides, fungicides)
- Motor oils, fuels, lubricants
- Paints
Extend the protection zone if there is any slope above your well that might promote run off from a wider area.
Top Tips for Protecting Your Well:
- Keep the top of your well at least 1 foot above ground
- Keep the well clear of debris
- Protect your well from being hit by vehicles or machinery
- Be sure to take precautions before and after extreme weather events
- Avoid allowing surface water to collect or pool around or near your well
- Never dispose of waste in unused wells
- Never tie an animal to your well
Gardening and Landscaping
Keep short-rooted plants at least 4 feet away from your well, and larger plants at least 20 to 30 feet away.
When landscaping near your well, take care when performing activities that could damage your casing, like using a lawn mower. Roots from plants and trees can also potentially damage your well casing.
Can a Neighbor's Lawn Fertilizer Contaminate My Well Water?
Possibly. Chemicals found in lawn fertilizers, such as nitrate, can leach through the soil into groundwater, especially if your well is shallow or located close to your neighbor’s property. Since these chemicals do not always easily degrade in groundwater, they can accumulate over time, increasing the risk of contamination in the long term.
Wells and Septic Systems
Wells should be installed a minimum of 50 feet away from your septic tank and at least 100 feet from the septic system’s drainfield, although these suggested distances can vary among states.[5] Proper upkeep of your septic system and the quality of your well water is often interrelated.
Pump your septic system at least every 3-5 years to avoid unprocessed water flowing into the drainfield and potentially reaching your groundwater, and have your septic system inspected annually.[6]
New home additions, like waste or chemical storage, should be built in accordance with your well’s protective zone requirements.
How Do I Know if My Well Is Performing Normally?
Your well is performing normally when your water flow is consistent, there hasn’t been any irregular behavior anywhere along the line, and no noticeable changes to color, odor, or taste.
Proper maintenance helps sustain flow, or the amount of water you are able to pump from a well (also referred to as well yield or performance).
Well yield tends to decrease over time, especially if the well was not initially installed properly. While decreases in flow are sometimes caused by persistent droughts, more often decreases in well yield over time are related to changes in the well’s water quality.
This can include:
- Build up from mineral deposits and microorganisms (like iron bacteria)
- Sediment obstructing the well’s pump from the water source
- Damage from pumping sand and sediment
- Corrosion in the well screen or casing
Various contaminants, both microbial and chemical, can cause these changes. Regular well water testing and well inspection can help you identify and successfully treat the culprit.
How Often Should You Test Your Well Water?
Even if your well has been properly built, installed, and has passed all inspections, you should test your well water annually to ensure your water is safe to drink. Well water quality is susceptible to changes in the environment.
Additionally, you should test your water any time there is a noticeable or sustained change in taste, odor, or appearance, or after your well system is serviced.
Is Well Water Safe to Drink?
Unlike city water, your well water safety is in your hands. It’s helpful to learn to identify different symptoms of contamination. However, it’s important to note that many pollutants don’t have easily detectable signs, so proper maintenance and regular water testing is the only way to monitor water quality over time.
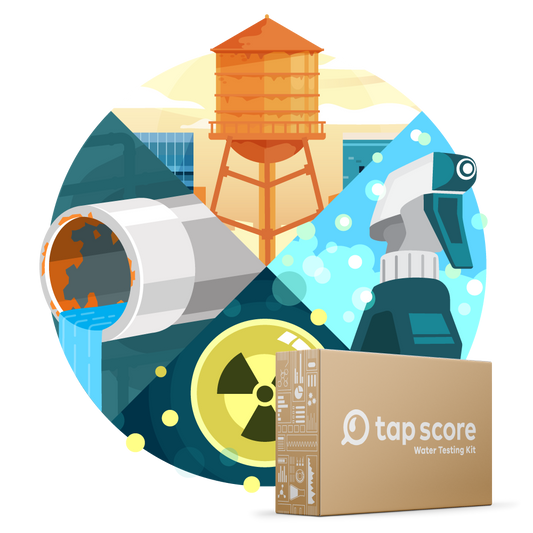
Groundwater is susceptible to a range of hazards—from microbes like coliform bacteria and organic contaminants like pesticides to inorganic contaminants like heavy metals and even radiological pollutants like uranium.
Ultimate Guide to Well Water Contaminants
Acidic Well Water
The results of a well water test might reveal that you have acidic well water. Acidic well water is a relatively common issue. It can cause corrosion and a bitter, metallic taste while basic water can have a slippery feel, a baking soda-like taste and can leave white deposits on your fixtures and appliances.

Acidic water by itself doesn’t cause any health problems. However, the corrosion of your plumbing may release toxic heavy metals, like lead and copper, that have harmful effects.
What to Do About Acidic Well Water.
What Should You Test for in Your Well Water?
For routine monitoring, different contaminants should be tested at different frequencies. It’s also very helpful to get to know concerns that are specific to your region, like if you live near heavy industry or agriculture, or if your aquifer has naturally occurring geogenic contaminants like arsenic or uranium.
The list below is provisional and based primarily on the most common problems for wells nationwide. However, groundwater is very context specific! It's important to take this list as a starting point, and do the required research on your local area to know what's most important to test.

It’s also a good practice to test your well water whenever there are major land use changes visible from your property, like gas drilling, agriculture, or industrial activity.
Get in touch with your local health or environmental health department to discuss any contaminants of particular concern in your area.
How Do I Test My Well Water in a Lab?
When Should I Test a Newly Drilled Well?
Newly drilled wells will need to be run at least 24 hours before testing. This allows the well to "settle in" so that the water being tested is more indicative of the water you will be using.
Sampling your well right after installation won't accurately represent water quality as it will likely have increased sediment and potentially other contaminant spikes. Nevertheless, we recommend you test your well before commencing full use. Just allow for the settling period first.
Where Can I Get My Well Water Tested for Free?
Reaching out to your state water board or other agency is your best bet to try and test your well water for free. Avoid free tests from filtration companies as they’re usually a part of an aggressive sales campaign.
The Best Well Water Test Kit
Always test before you treat. To test your water confidently and accurately you want to use a certified laboratory. “Free” tests and DIY kits have major drawbacks compared to a professional lab, like reduced accuracy or high detection limits.
Testing your water with a lab is easy, especially with Tap Score’s Well Water Core Kits.
Check your state’s well maintenance requirements to see if additional routine testing is needed.
Well Water Treatment Options
After you test your well water, you might find that you have contaminants you’d like to remove. Most water quality problems can be successfully resolved with the right treatment. But you need to know exactly what you’re looking to treat in order to make the best decision.

- Point-of-entry (POE) devices and disinfection techniques allow you to treat your well water before it enters your home.
- Point-of-use (POU) devices treat your water at the tap where it will be used.
POE Well Water Treatments
 POE systems filter your well water so that treated water goes out to every tap. Treatment systems include:
- Water softeners
- Sediment filters
- Acid neutralization filters
- Ultra-violet disinfection (with pre-filtration)
- Anion exchange
- Oxidation filters
- Ozonation
- Aeration
- Carbon filters
POU Well Water Treatments

POU systems treat your well water at individual taps or as pitchers or countertop filters. Treatment systems include:
- Carbon filters (granulated activated carbon, carbon block)
- Activated alumina
- Reverse osmosis
Common Well Disinfection Techniques
If you’ve tested your water and found evidence of microbial contamination, then you'll have to choose a way to disinfect.
When Is Shock Chlorination Necessary?
Shock chlorination is a popular treatment option when pathogens have suddenly been detected in your well. Shock chlorination is a one-time chlorination treatment.
- Is shock chlorination part of regular maintenance?
No, it generally only needs to be done when a well is opened or if bacteria is detected. We recommend having it done by a professional (disinfection takes many steps and can be unsafe to do by yourself).
Quick Guide to Shock Chlorinating Your Well
What Is Continuous Chlorination?
Continuous chlorination disinfection involves injecting a controlled, continuous flow of chlorine into your well or water system.
How Does UV Disinfection Work for Wells?
UV disinfection uses ultraviolet light to damage the DNA of microorganisms, preventing them from reproducing any further.
What Should You Do With Your Unused Well?
Unused wells should be correctly sealed by a licensed well contractor before they are abandoned. While a properly maintained well can last for decades, there may come a point—due to natural events, abandonment, or equipment failure—when it must be decommissioned.
Improperly abandoned wells that remain unsealed pose a big risk to the environment and your health.[9] Unsealed wells are a direct gateway for pollutants to contaminate your local groundwater. This affects not only your property, but anyone who is drawing water from the same aquifer.
Old wells with larger openings are also potential safety hazards for small children and animals. Contact a certified well systems professional if you need to decommission a well at the end of its lifespan or if you find an abandoned well on your property.
Annual Well Maintenance Calendar
As the seasons change so should your well maintenance routine. Different weather patterns—like heavy rains, snow, and long periods of dryness—affect your water quality in a variety of ways. Testing your water during specific times of the year can also provide greater insight into your water quality.
Always survey your well when preparing to perform seasonal maintenance (like shutting down or restarting a well). Keep a lookout for:
- Damage: Are there any new cracks or holes in the well casing, instances of corrosion, pipe fissures, or soil settling?
- Changes to your well cap: Is your well cap securely attached to the well casing? Is it broken or missing? Has it tilted ( his can mean frost has pushed up the conduit and pinched the wires powering the pump)?
- Electrical issues: Are all electrical and other connections still watertight? Are there any loose or exposed wires?
SPRING Well Cleaning and Maintenance
Whether you shut your well down over the winter or kept it in use, you should perform a visual checkup for any winter damage.
- Check and change your water treatment filters. Check that your treatment filters are working properly according to their manuals. Replace filters if they have reached their lifetime use.
- Flush and fill the system. If the system was drained and unused over winter, turn on the breaker and run every faucet in the home. Let the water run for at least five minutes to flush your plumbing and check for new leaks.
- Test your water. If you’re performing your annual water test, test for coliform bacteria, E. coli, nitrates, pH, TDS, and contaminants of local concern (e.g., certain pesticides, PFAS, etc.). This is a good opportunity to see how your water quality may have changed over the winter—especially if the well was not in use. Spring is a great time for preventative coliform testing, before the weather gets too hot.
- Schedule a well maintenance appointment or annual inspection. A licensed technician can confirm that your well system is properly thawed and ready to use if it was shut off over the winter. They can also confirm your well is operating properly.
- Protect your well. Don't let water pond around you well during heavy rains or flooding, plant any high-maintenance greenery with longer roots within 4 feet of the well, use any pesticides, herbicides, or fertilizers within 100 feet of the well or use mulch or plant anything that can attract pests within 4 feet of your well.
SUMMER Well Cleaning and Maintenance
In the summertime, you’ll want to:
- Pay attention to your landscaping. Remove weeds and debris around the well. Take care not to damage your well head while mowing around your well.
- Schedule a pumping/drawdown test.[10] Well flow is best measured during dry periods of the year. Taking these measurements when water levels are low helps ensure you are using your well sustainably. A decrease in water production can be a sign that your well needs cleaning or that the aquifer is nearly depleted. Some states may require routine testing.
If Returning to a Summer Home:
- Schedule an inspection. Summer homes that are frequented one season a year should open up with their annual inspection and testing regimen.
- Flush and fill the system. Remove any stale water that has been sitting in the pipes and pressure tank by running all faucets for five minutes.
- Test your water. If you haven’t used your home since last summer, you’ll want to perform your annual water test (which tests for coliform bacteria, nitrates, pH, etc., as mentioned above). Keep a record of water test results so you can compare water quality from year to year. This is especially important if there is new construction or land use changes visible from your property.
- Check and change water treatment filters. Look for strange colors, buildup, or taste changes in your drinking water.
If Leaving a Summer Home:
- Turn off the system.
- Close the main water valve in the home and turn off the electricity to the water pump.
- Check manuals for long-term inactivity recommendations for your other well equipment.
- Drain the plumbing. Fully drain pipes by opening all the valves.
- Winterize your well. If your house is in an area prone to freezing temperatures, keep pipes and above-ground pumps insulated.
- Drain your toilets and fill their tanks with non-toxic, plumbing antifreeze.
AUTUMN Well Cleaning and Maintenance
When the leaves begin to fall, it’s time to think about your well again. Here are some autumn tips:
- Protect your wellhead. Don’t let leaves or other debris pile up around the well.
- Install and replace treatment filters. Depending on the water usage, getting into the habit of installing new filters before the start of any season is good practice.
- Winterize your well. To prepare for the coming winter, insulate pipes that run through non-heated space—like basements—using thermostatically controlled heat tape or insulation sleeves. Keep above-ground pumps inside an insulated housing.
- Turn off the system if you won't be using your well over the winter. Shut down power to the well pump and close the main water valve before you close down your home for the winter.
WINTER Well Cleaning and Maintenance
If you live in a part of country with particularly cold winters (snow and subzero temperatures), there are a few things you’ll want to add to your well maintenance regimen:
- Remove snow. Don’t let snow pile and melt around the well.
- Monitor water quality. If you live near a roadway or parking lot that is regularly salted, keep an eye on your water quality after the snow melts. Road salts can have a big impact on your drinking water.
- Emergency power supply. Most wells need steady electrical power to run water to your home. Prepare for potential winter power outages by having a backup generator.
- Prevent freezing. Water inside the well cannot freeze since it’s below the frost line, so only above-ground equipment and pipes are at risk. Make sure these parts stay insulated. During freezing weather, a continuous slow drip of warm water can help ensure pipes don't freeze.
- Defrost pipes. It's important to thaw frozen pipes as soon as possible to prevent cracks. A frozen water supply pipe or above-ground well pump will cause a loss of water pressure.[11] To find the freeze point, turn off the water supply to the house, follow the pipes from the faucet and look for frost-covered, cracked, or bulging pipes. Warm the pipe with a hairdryer, heat lamp, or heating pad.
If you’re looking for a certified contractor for your annual inspection, contact us. We can help you find a licensed professional and answer any questions on well water quality issues and testing.
Read More
▾Where Can I Get My Water Tested?
How Do I Test My Well Water in a Lab?
Septic Systems and Your Well Water
Ultimate Guide to Well Water Contaminants
Quick Guide: Coliform Bacteria in Well Water
The Drinking Water Taste Guide
Shock Chlorination: How to Get Rid of Bacteria in Your Well Water
Sources and References
▾- Sealing of Wells and Borings | MN Dept. of Health
- Protecting Wells with Sanitary Well Caps and Grouting School of Forest Resources
- Homeowner's Maintenance Checklist - Wellowner.org
- Protecting Your Wellhead
- Setback Distance From Septic to Drinking Water Well – Drinking Water and Human Health
- How to Care for Your Septic System | US EPA
- Arsenic in Groundwater | CLU-IN
- TDS and pH | Safewater.org
- What to Do About Old, Unused Water Wells
- An Introduction to Well Drawdown
- Protecting Water from Freezing | Small Farm Sustainability
- Well Owner’s Handbook - A Consumer's Guide to Water Wells in Minnesota
- Learn About Private Water Wells | US EPA
- Groundwater | Contractor state licensing
- What To Do When Your Water Well Begins To Pump Sand Or Grit
- Private Wells Sampling and Testing: A Guide for Public Health Laboratories

back to top
Related Articles
-

What Do Culligan ZeroWater Filters Remove from Drinking Water?
Our next unbiased filter review explores Culligan with ZeroWater filters and the contaminants they are certified to reduce in your drinking water.
-

How Tornadoes Threaten Drinking Water Quality—and What to Do About It
Learn how tornadoes contaminate drinking water, warning signs to look for, when to test, and what to do while waiting for lab results.
-

Is Tap Water Safe for My Child? New Parents’ Guide
If you’re expecting a child or already have an infant or toddler in the home, your drinking water quality is more important than ever. We’ve prepared the following scenario guide...


Shop our most
popular tests
- I Have City Water
- City Water
- I Have Well Water
- Well Water

Essential City Water Test
Basic test panel for water utility customers primarily concerned by metals, aging pipes, and infrastructure.
Advanced City Water Test
Ideal for testing water provided by a local water utility–including metals, minerals, and chlorine-related byproducts.
Extended City Water Test
Comprehensive testing for the core concerns plus radioactive particles and additional disinfection byproducts.